An
Answer-Only Cordless Phone © JR
Nelis 11SEP20
My wife has Vascular Dementia. This year her condition deteriorated to the point where I had to move her into an Assisted Living facility. She is still very people oriented. Whenever she was still at home, she spent a lot of time talking to her friends on the phone. So, it made sense for me to set her up with a personal phone in her room at the Assisted Living facility. So, I did.
However, being new at this, I did not anticipate the number of ‘problem calls’ that she would make with that personal phone. While she was cordial whenever she was taking to her friends on the phone, she was not so cordial with her immediate family. There were a number of instances of sequential calls that I will just classify as ‘nasty calls’. Many of them were of the “I’m ready to come home now, come and get me” nature. It got to the point where just about all of her calls to family members were going to their answering machines, and were never being responded to. Rather than this tapering off as we hoped, they increased.
Then one day, after she got frustrated because all of her calls to family were going to answering machines, she called 9-1-1 and told them that she had been abandoned there and needed a ride home. Well, that was the day that they took her personal phone away from her. Her friends kept asking me when she will get her phone back so they can resume calling her and talking to her. The answer is: Who knows when they will trust her with it again. People with dementia are unpredictable. So it was starting to look like the facility may never be willing to give her personal phone back to her.
So, I decided that what she needs is an “Answer-Only” phone. An Answer-Only phone would allow friends and family to call her - one that she would not ever be able to call out on. Yes, it will be a ‘catch her when you can’ situation. But that is far better than the current situation of never being able to talk to her on the phone at all.
She is accustomed to using Panasonic cordless phones on her landline. In her situation, it is best to keep things just as they are, and not introduce anything new. The Panasonic phone that I put into the Assisted Living facility for her is almost exactly like what she used at home. After fretting about how I would modify this cordless phone’s circuit to accomplish that, I had a KISS moment and realized that all I really needed to do was disable the ten numeric buttons that are used to dial a phone number.
She is using a Panasonic KX-TGD562G Cordless Phone. Fortunately, disabling the numeric buttons on that model was not terribly difficult to do. Like many consumer electronic devices, there are conductive ‘pills’ underneath the buttons. Whenever the buttons are pressed, those conductive pills are then pressed against the printed circuit board that is below the buttons and that completes a circuit. I suppose there are various ways of disabling these buttons. I chose to remove those conductive ‘pills’ from the bottom of those ten buttons. The steps required to do that for this particular brand/model are shown below.
Summary
This ‘Answer-Only’ Phone should be useful in any kind personal care facility where it is best that the residents do not have the ability to dial out using their personal phones. In that situation, equipping them with an Answer-Only phone like this provides a way for them to still have a personal phone that family and friends can use to call in and talk to them.
NOTE: The Panasonic KX-TGD562G Cordless Phone System that I purchased was an Answering Machine and had two handsets. Certain setup functions, like entering a custom answering message, require the use of a handset that still has all of the numeric buttons working. So, I only modified one handset to make it Answer-Only. I kept the other unmodified handset at home to allow me to do the setup functions when required.
How to
Make the Panasonic KX-TGD562G Cordless Phone Handset “Answer-Only”
( Click on any Photo for a larger view )
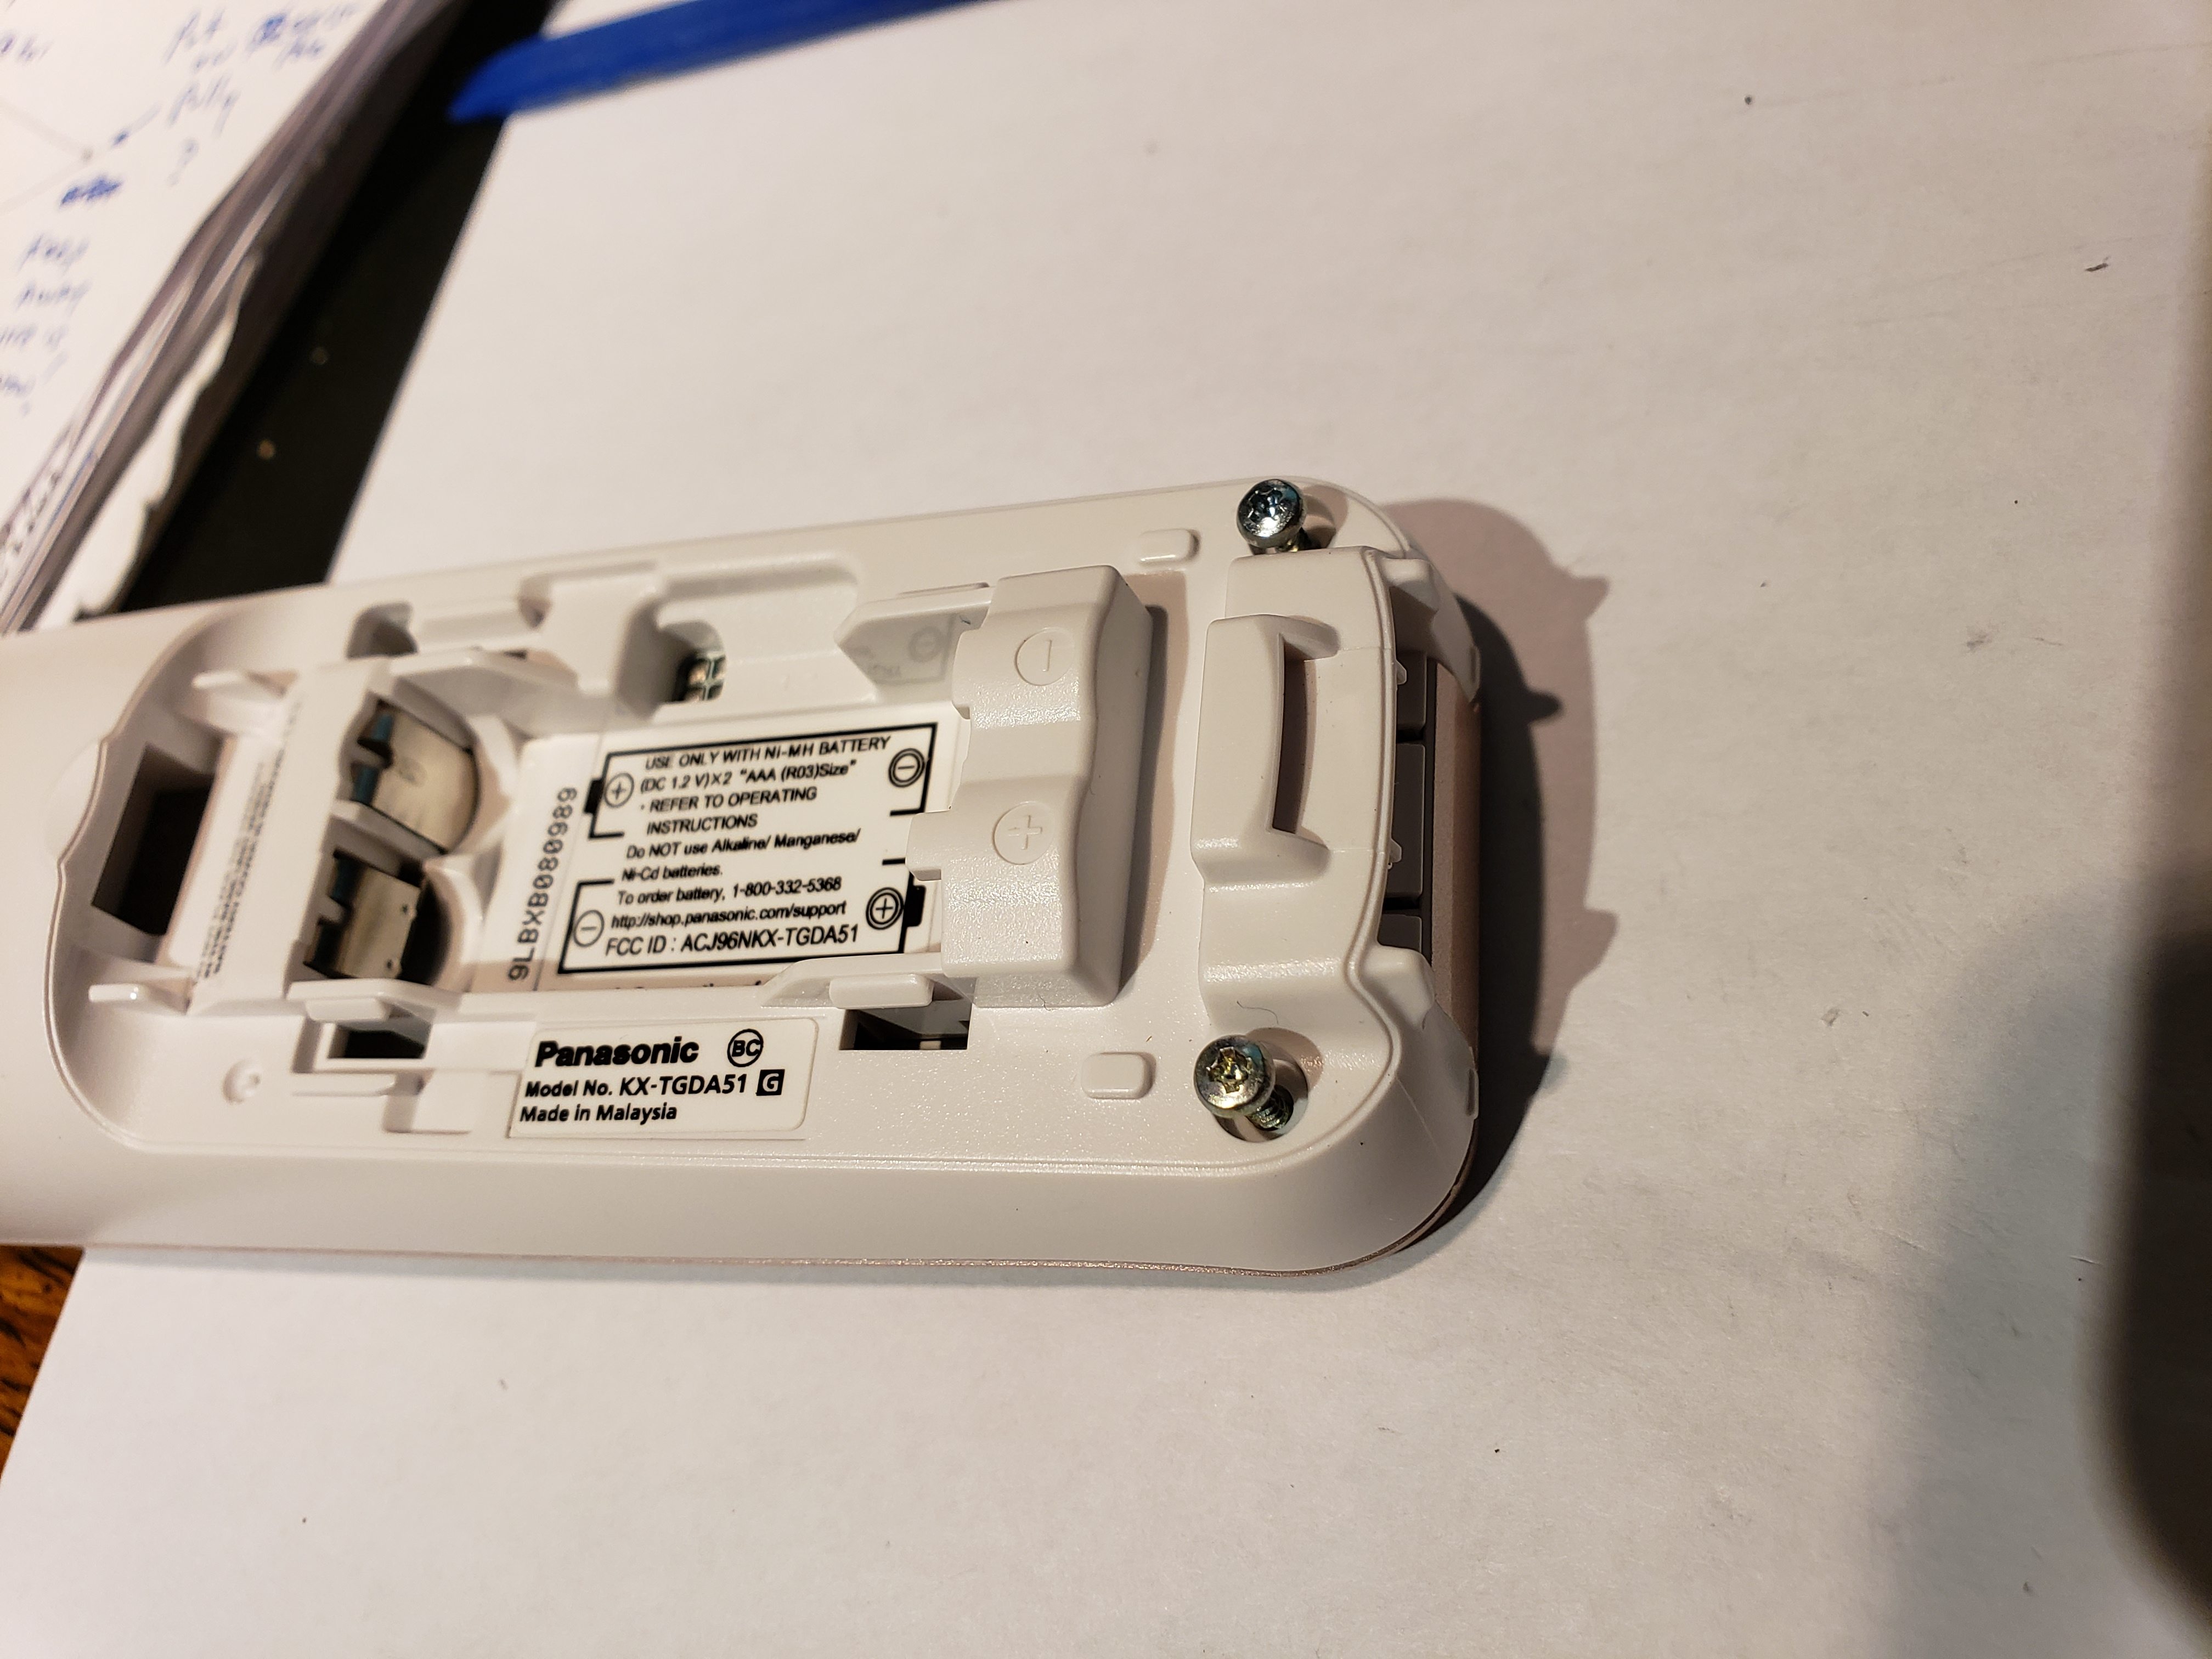
Remove the Batteries
Remove the 2 Screws at the bottom
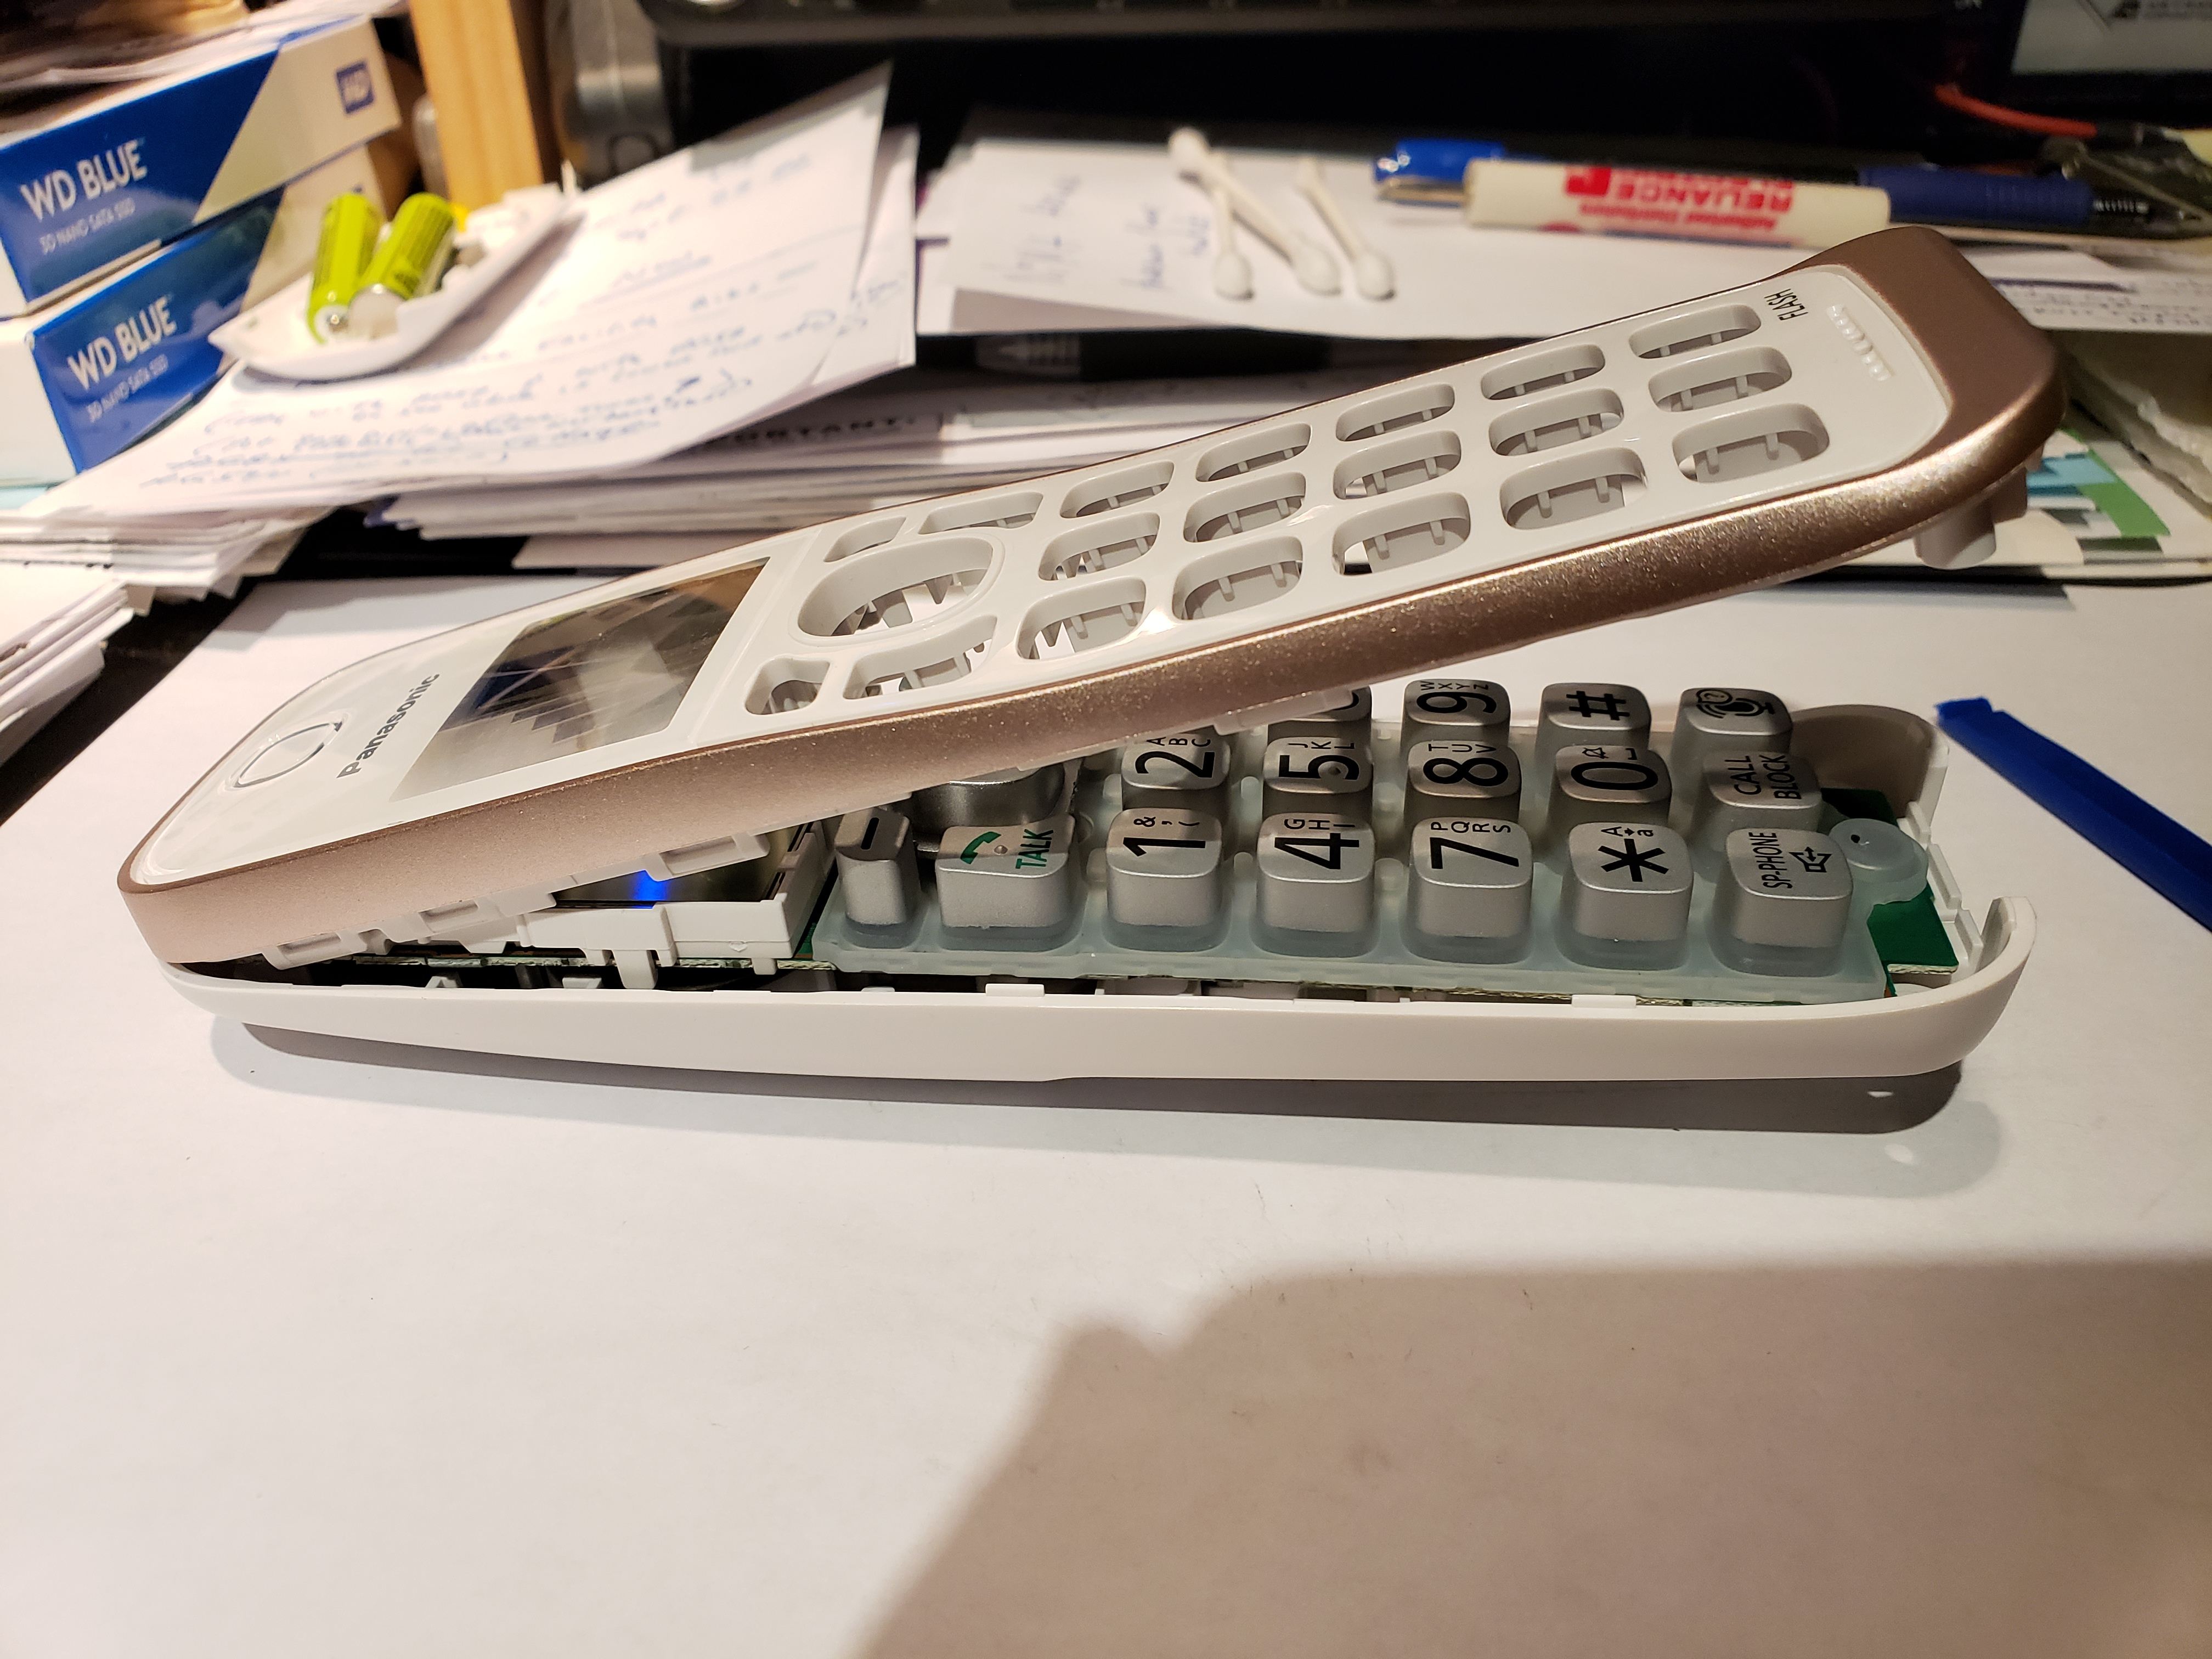
Run a plastic case opening tool up each side to pop the top off the handset
The top end did not want to snap off, but I was able to remove the silicon button membrane with just the bottom of the cover hinged up as shown
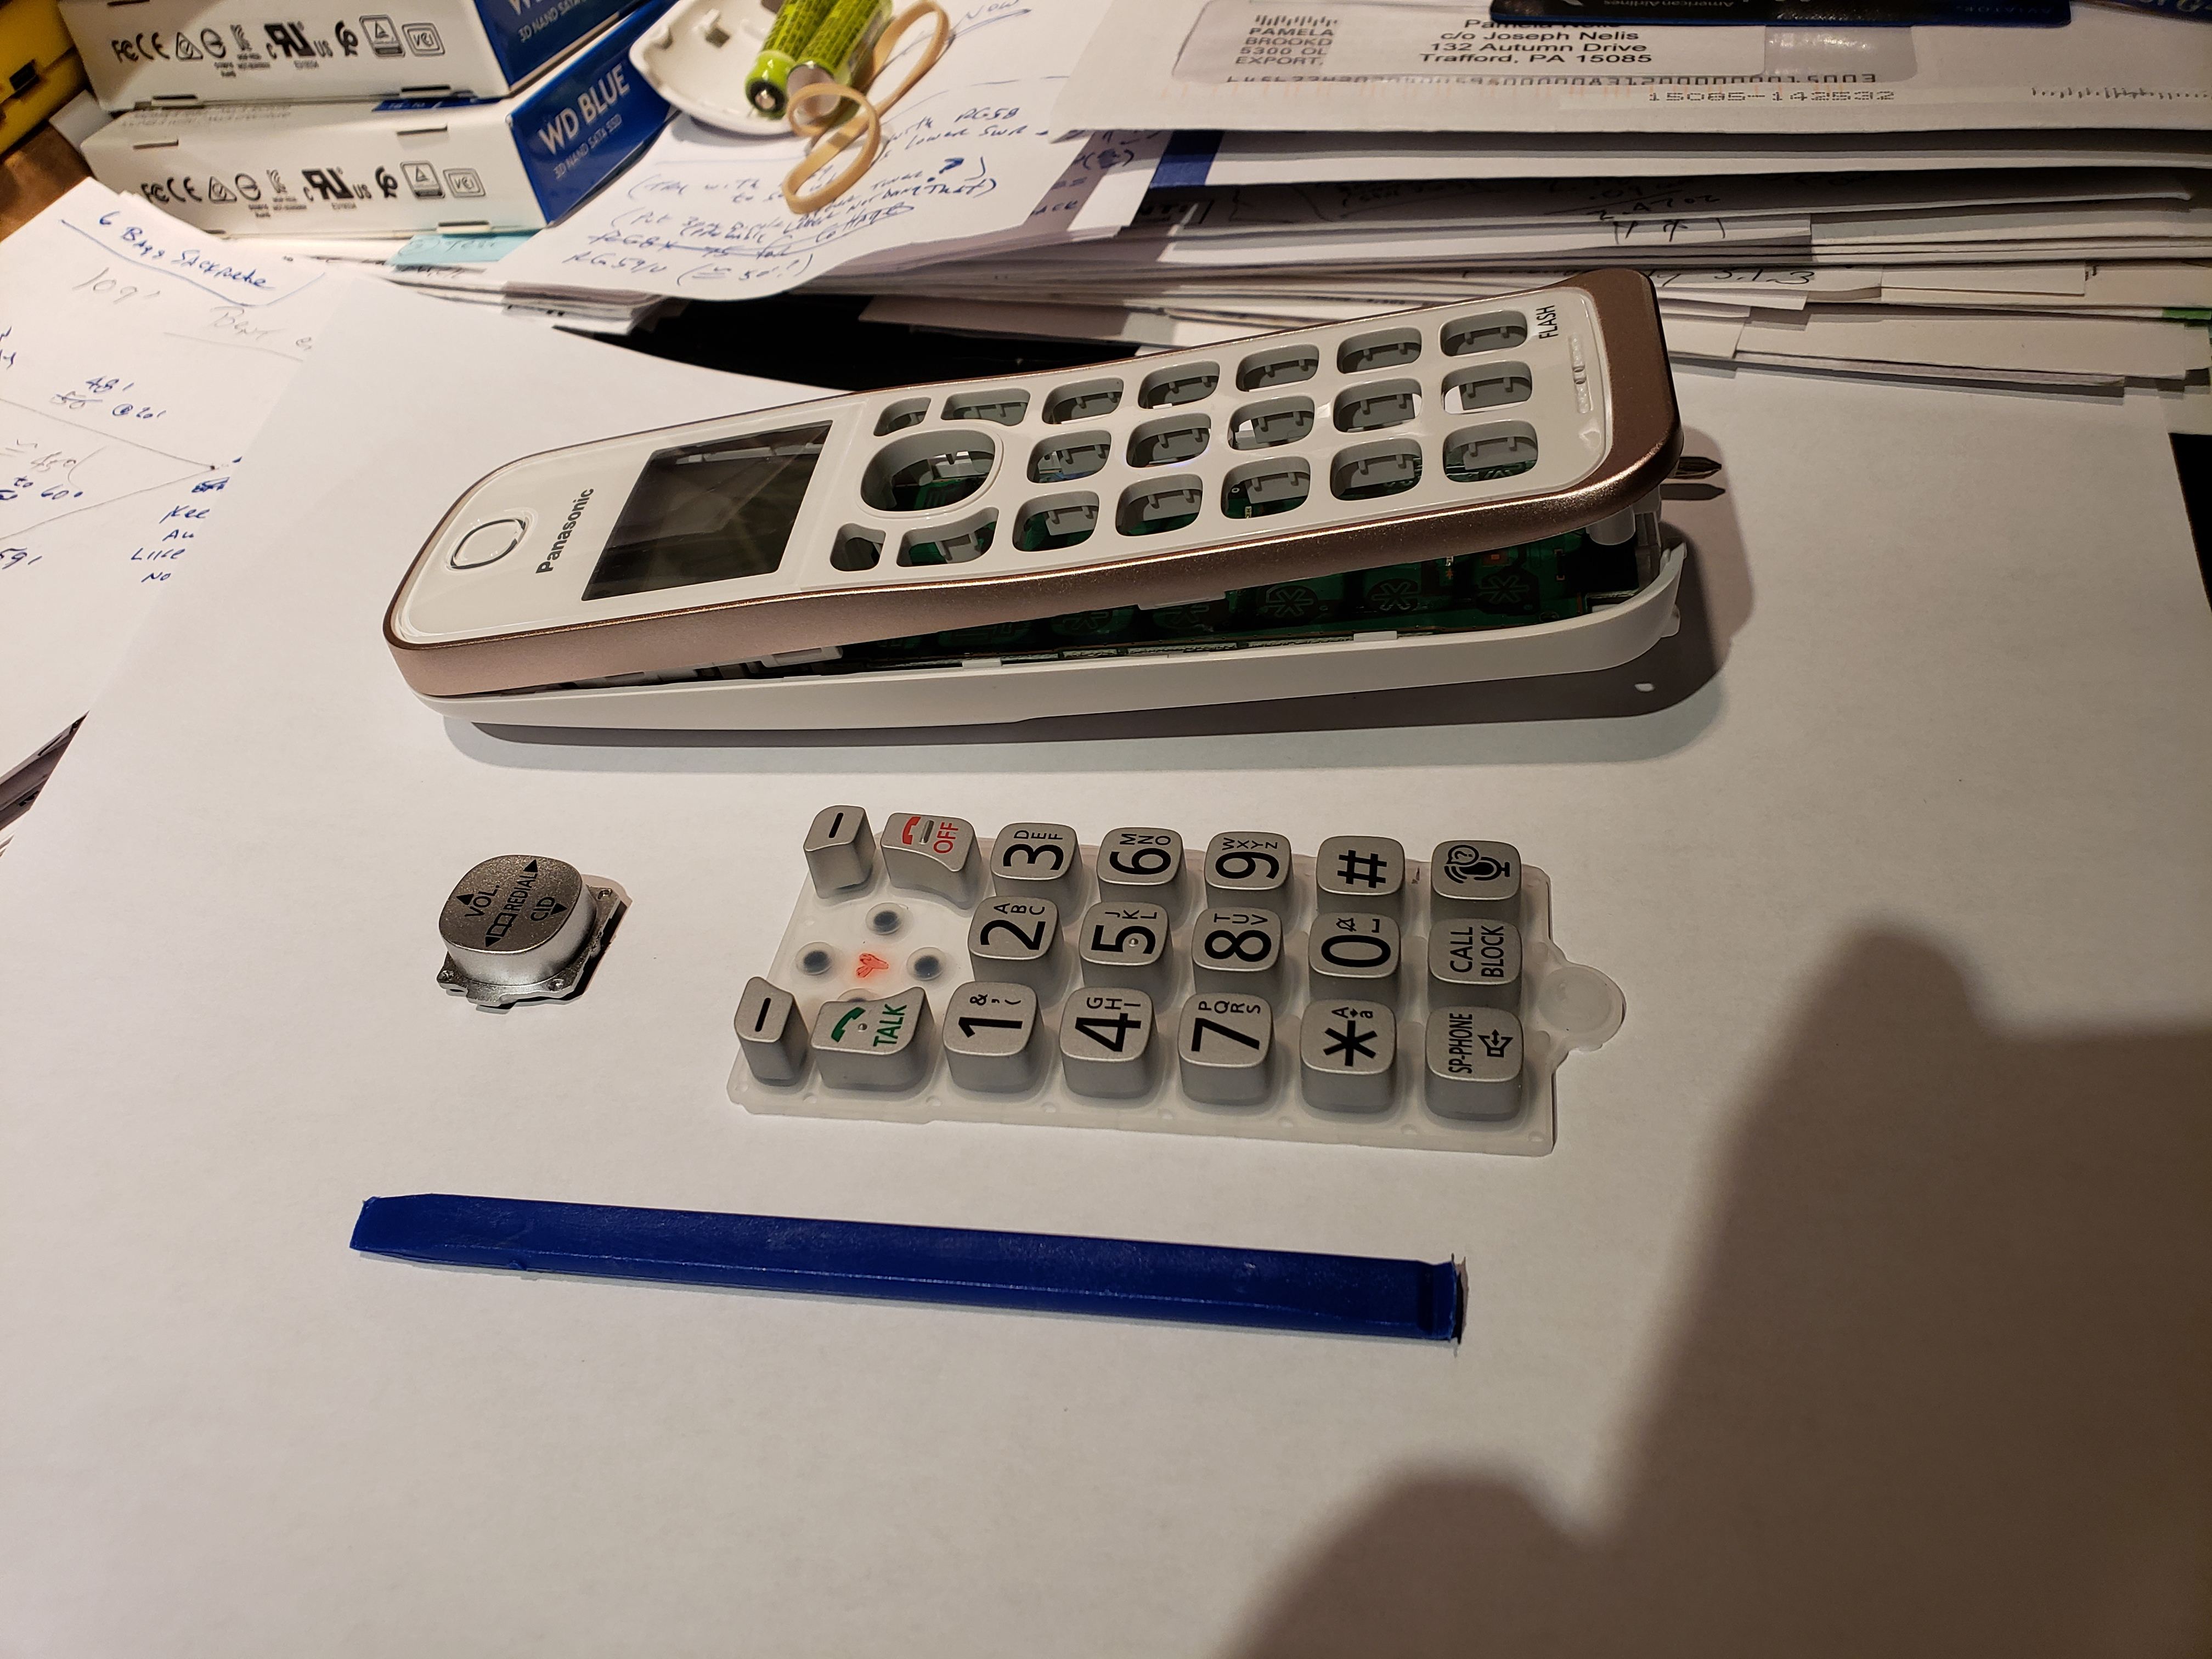
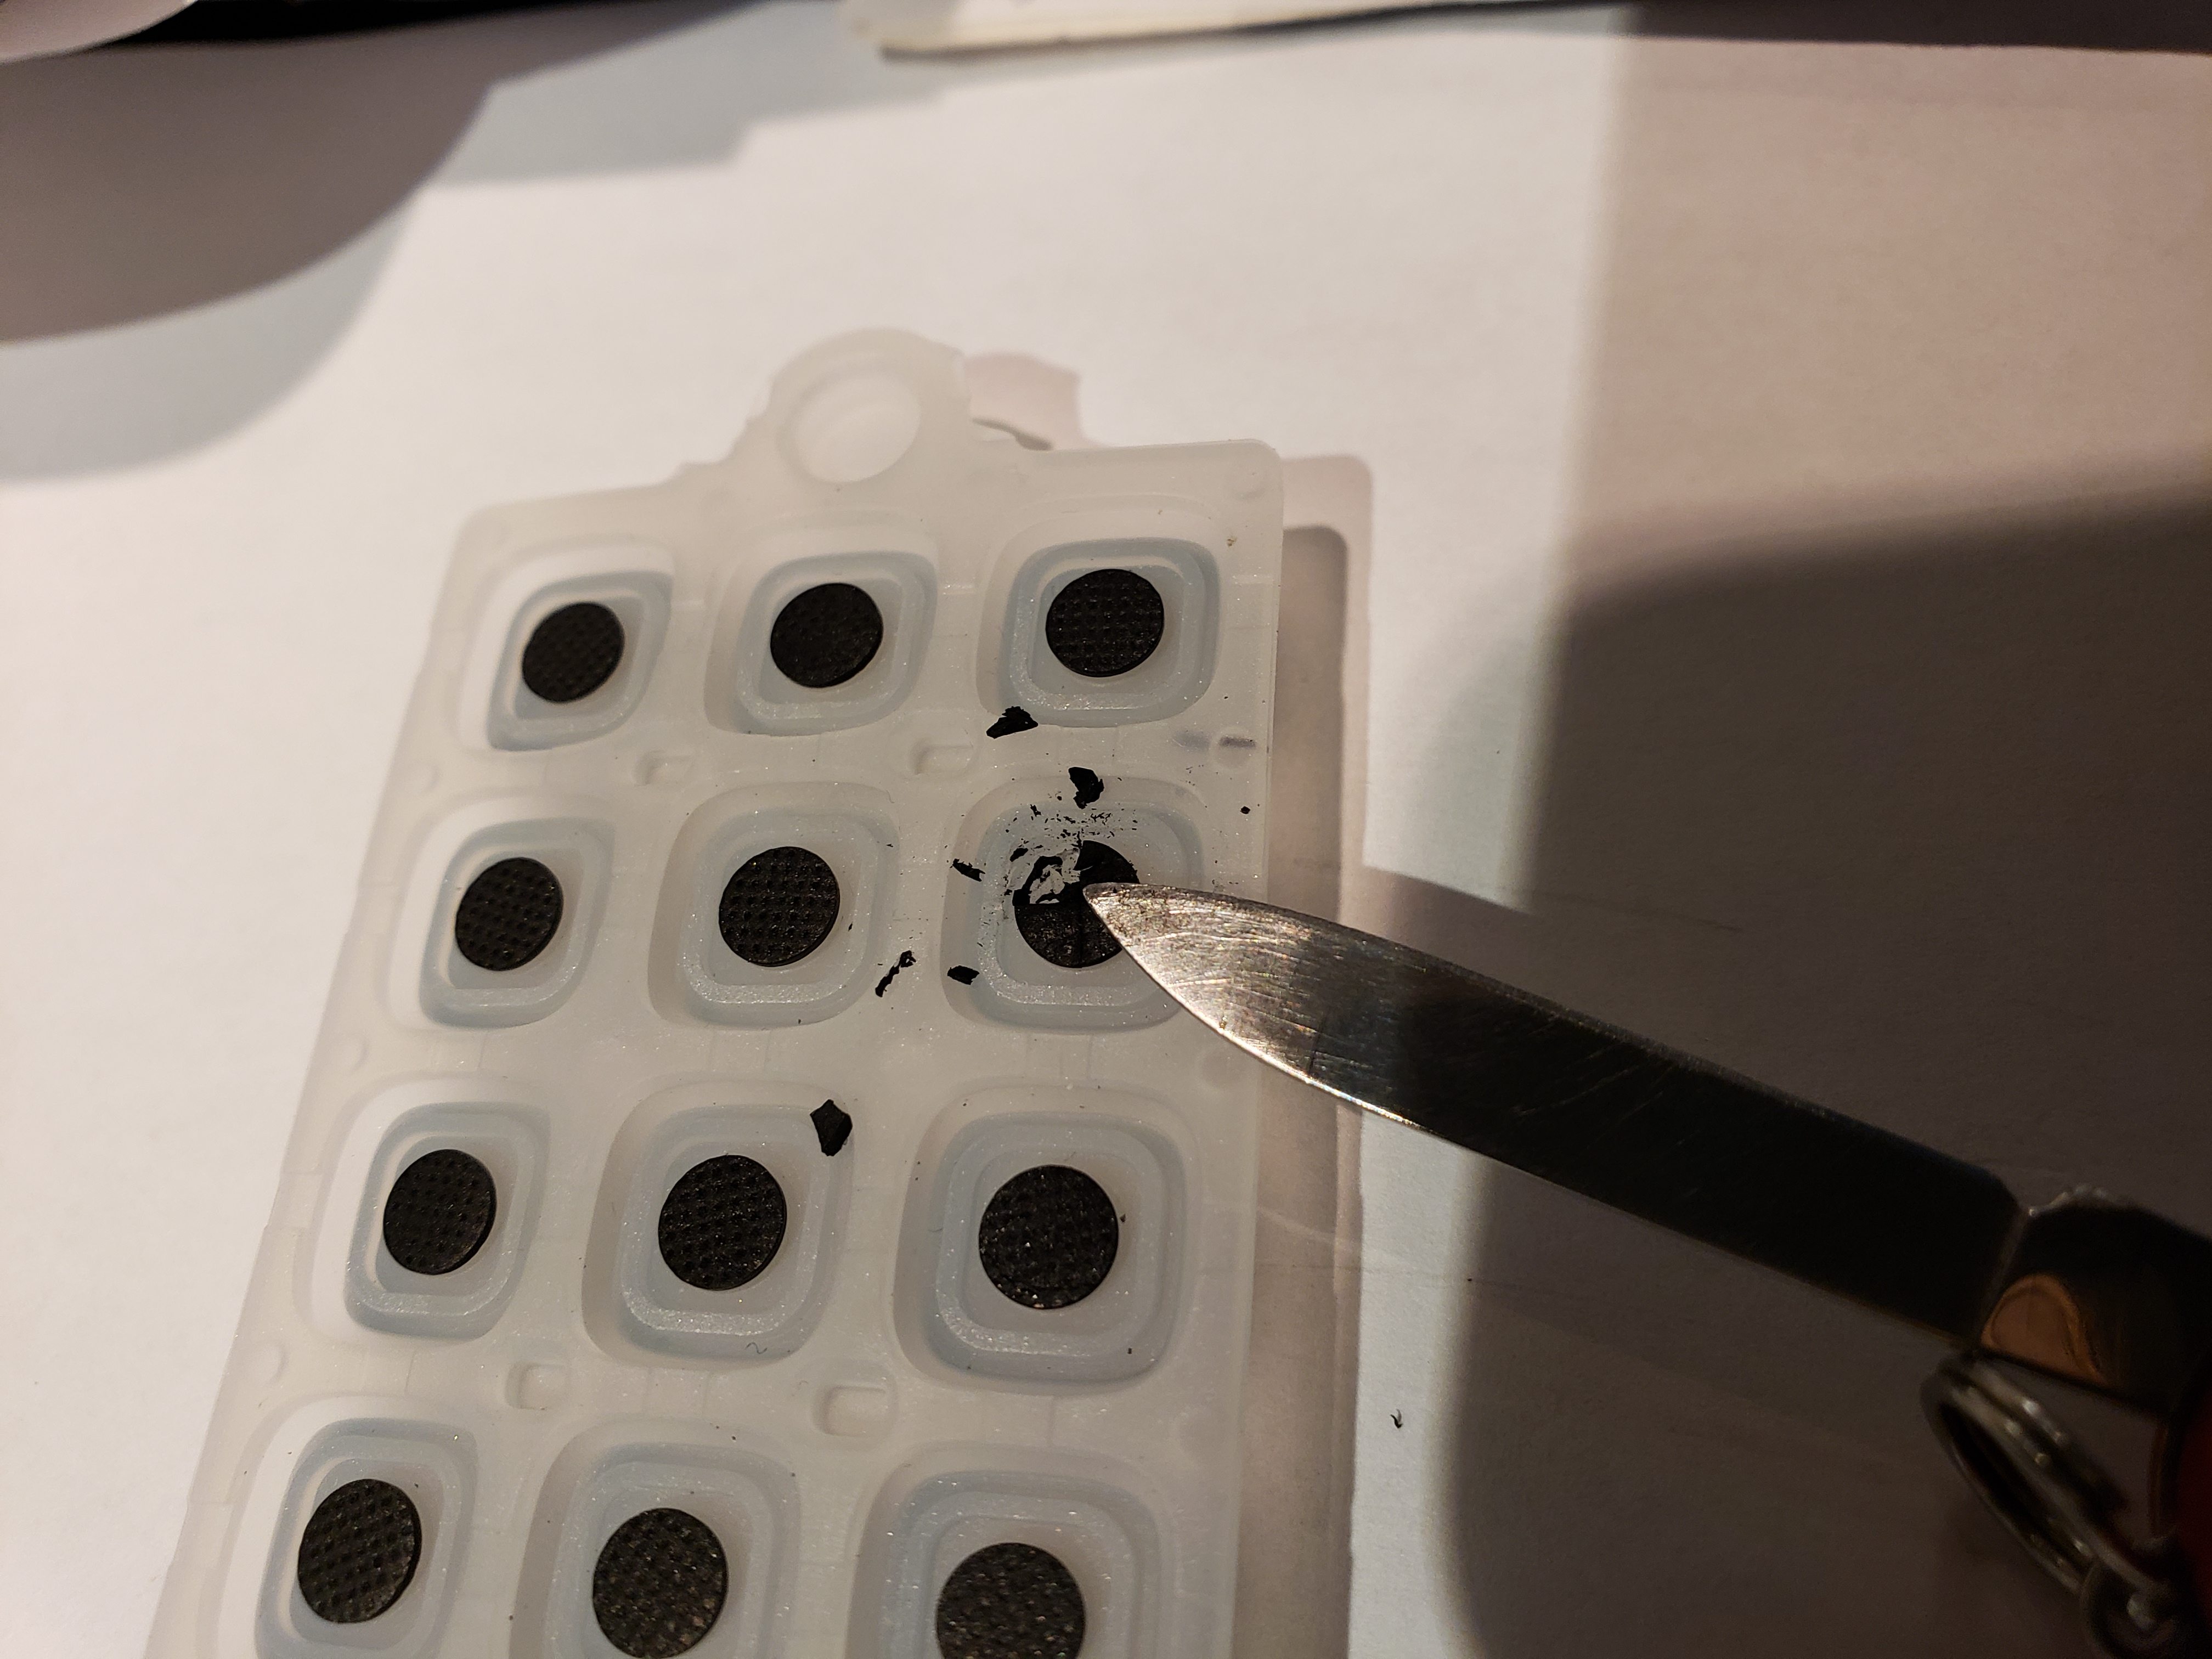
The button membrane has a conductive pill glued under each button. Each of those conductive pills completes a circuit whenever it is pressed against the phone’s circuit board.
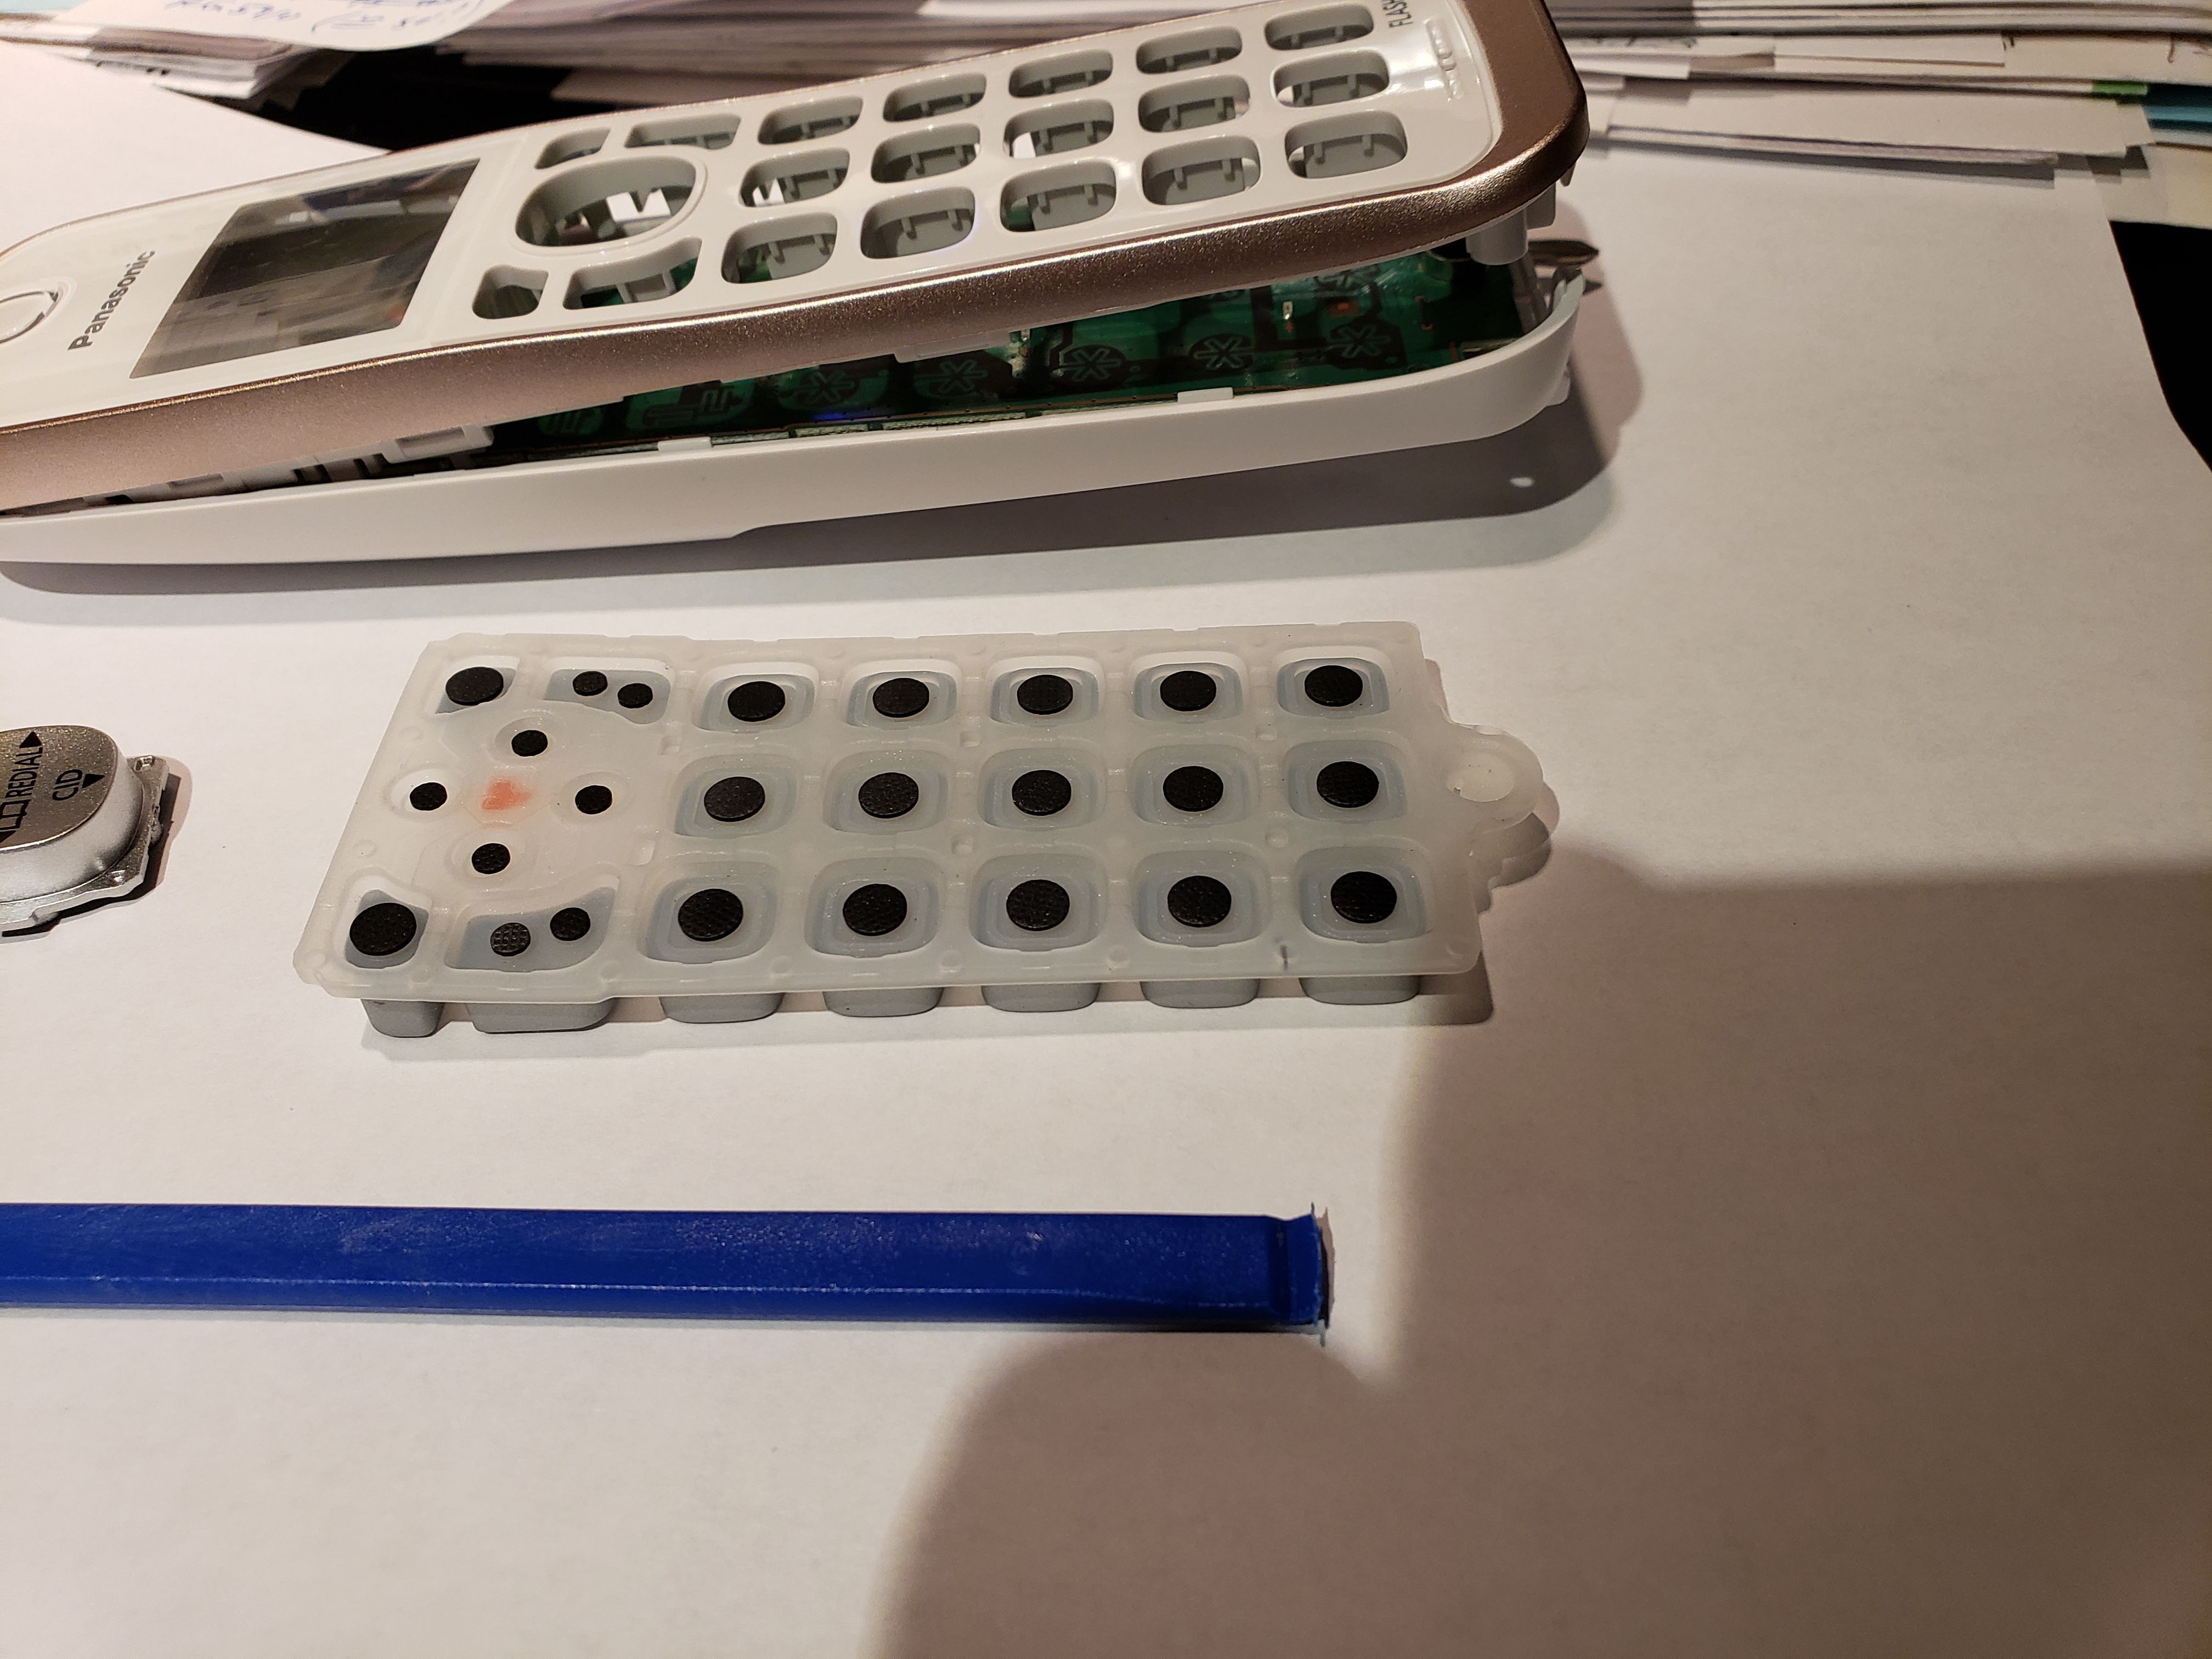

To make this an ‘Answer-Only’ Phone, I removed the conductive pills from the 10 numeric dialing buttons (I also removed them from the # and * buttons)
I found that easiest to do if I first cut the pill into 4 pieces (like you would a pizza) then removed each of those quarter pieces (the least resistance seemed to be when pushing the quarter pieces out from the center rather than lifting them). Some came easier than others.
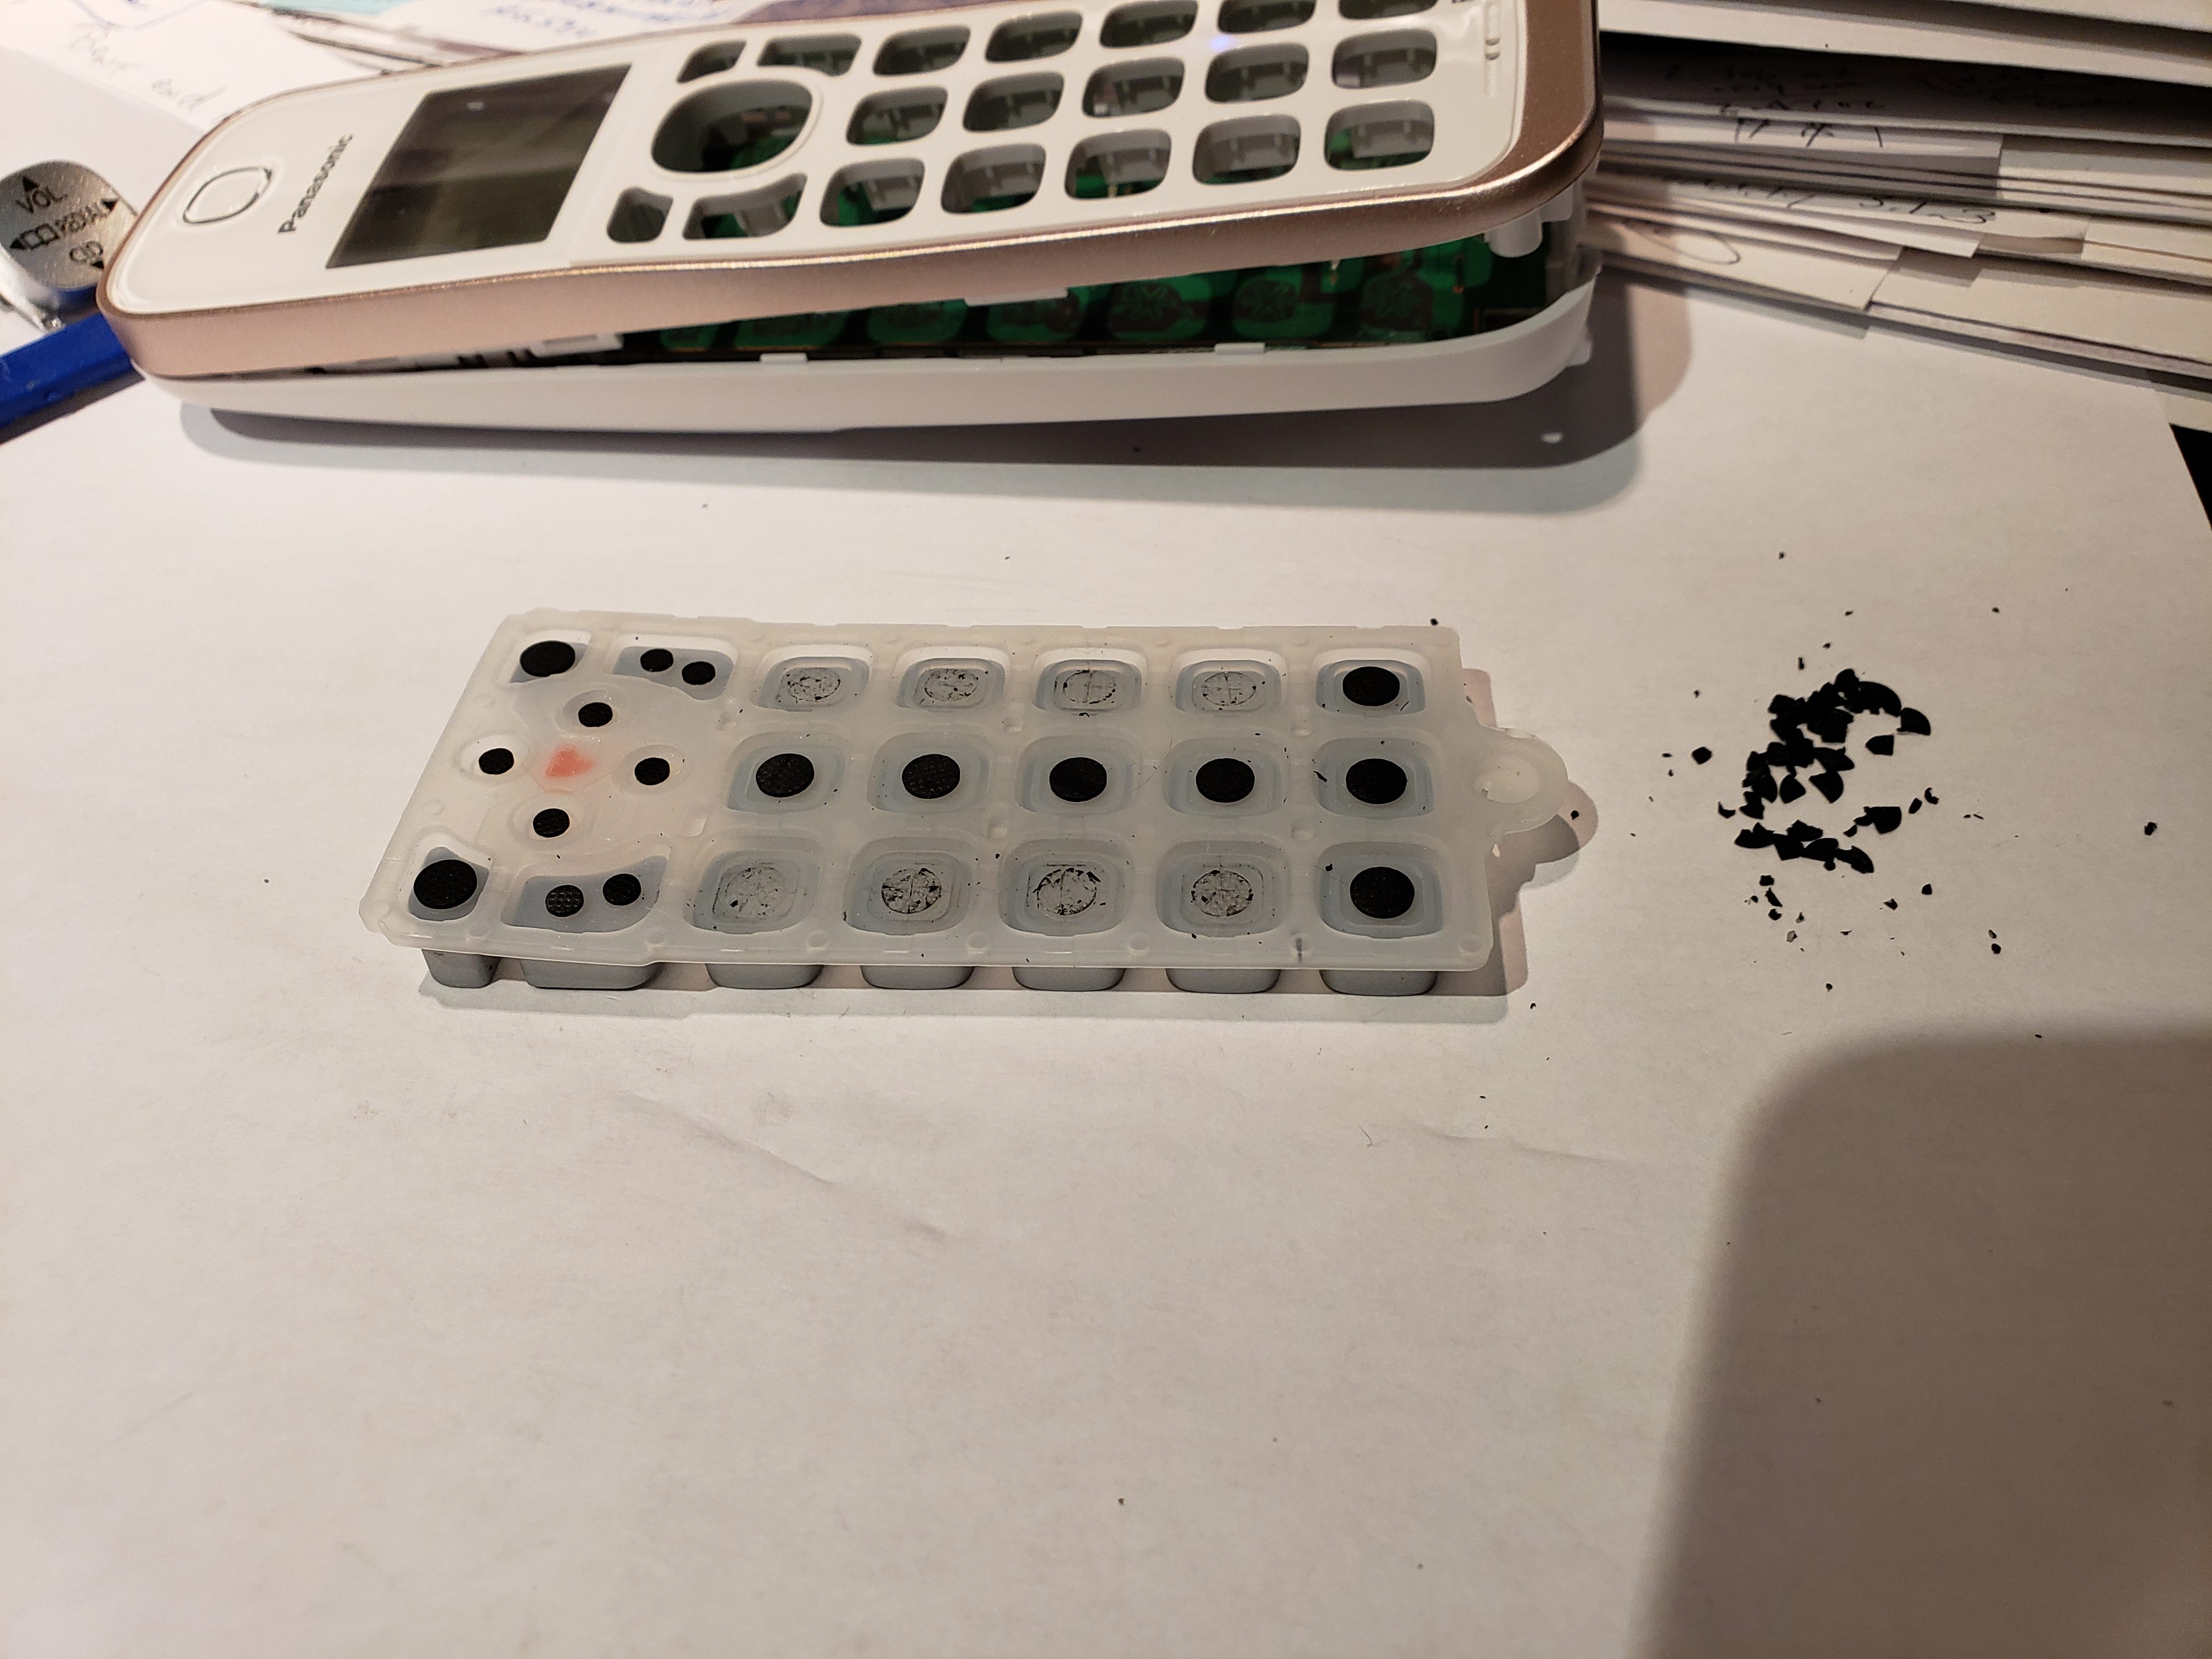
Use a Q-Tip and some rubbing alcohol to clean up any residual glue still on the membrane. Make sure no fragments of the conductive pills are still in any of the other buttons. Tweezers can be helpful.
The following picture was taken whenever I thought I was there. But testing showed that this was NOT clean enough yet. It took more work.

Whenever it is very clean and dry, put the button membrane back into the handset. Line up the 4-way wobble button and snap the cover closed
Reinstall the batteries (Hold off on reinstalling the screws for now)
Test the modification using a live phone line. Press [Talk] to get a dial tone and then press each numeric button a couple dozen times. You should not be able to interrupt the dial tone with any button press. If you do interrupt the dial tone, note the number that is displayed. That button needs more work. Panasonic engineered this phone so that the buttons would work reliably – it only takes a tiny sliver of the conductive pill making contact across the circuit board traces for a button push to be recognized. It takes some time and effort to overcome Panasonic’s good design!!
Test the Answer next. Call the number that the phone system connected to and confirm that you can still Answer an incoming call with the [Talk] button and then hang up the call with the [Off] button.
Whenever all of your testing has successfully passed, then reinstall the 2 Screws at bottom.